We have added a new form to help you track Fintrac information for your deal clients.
- This new feature will also help you compare your clients to the Terrorist List and the Money Laundering List.
- Please contact Support@EnviroMint.com for any assistance in setting up Fintrac.
1. FINTRAC Setup - Part 1 of 2 - Deal Role
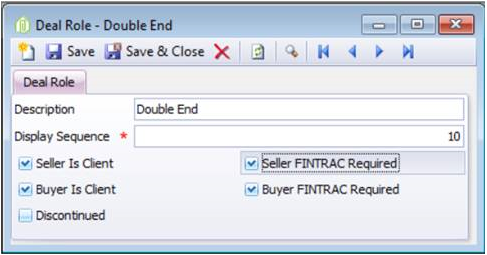
- To turn Fintrac on open up Setup -> Deals -> Deal Role
- Go through each deal role and click on either “Seller FINTRAC Required” and/or “Buyer FINTRAC Required” as necessary.
2. FINTRAC Setup – Part 2 of 2 – FINTRAC Identification Source
- Review/Edit/Add New Identification Sources (i.e. Driver’s Licence, etc.) by opening up Setup -> Deals -> FINTRAC Identification Source

3. Deal Contact tab
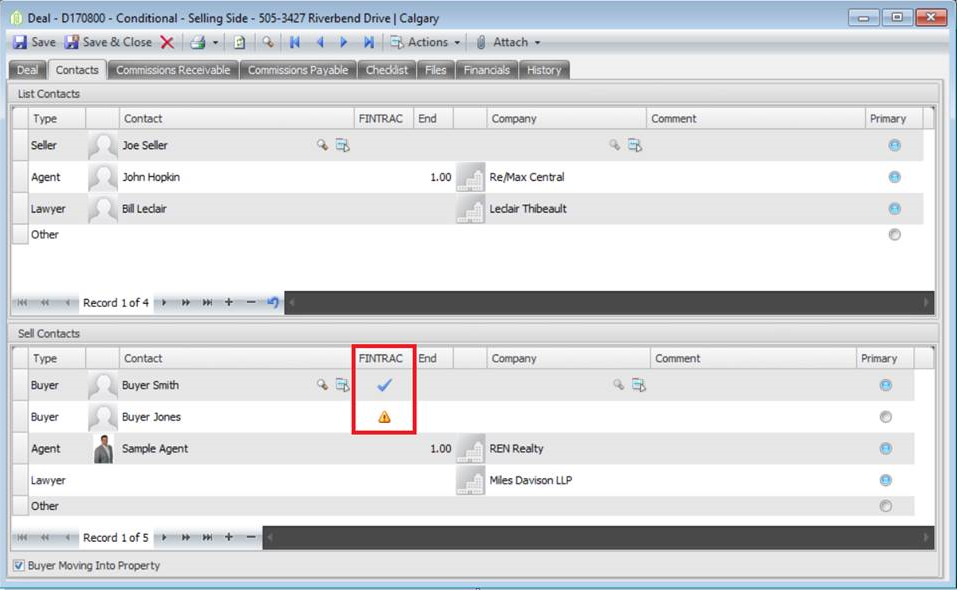
- We have added a new column in the Deal Contact tab called FINTRAC.
- If the deal’s role is setup to require FINTRAC you will see 1 of 2 icons:
- Yellow Triangle (warning) – indicates the FINTRAC is required, but has not yet been marked as “Completed”.
- Blue Check Mark – indicates the FINTRAC is required & is “Completed”.
- You can manually add a FINTRAC to a Buyer or Seller by double clicking on the FINTRAC field.
- If the FINTRAC is automatically added, but is not required, open it and check the box labelled “Not Required”.
- If you attempt to payout a deal that is missing a FINTRAC you will receive a warning, but you will not be stopped from continuing.
4. NEW FINTRAC form
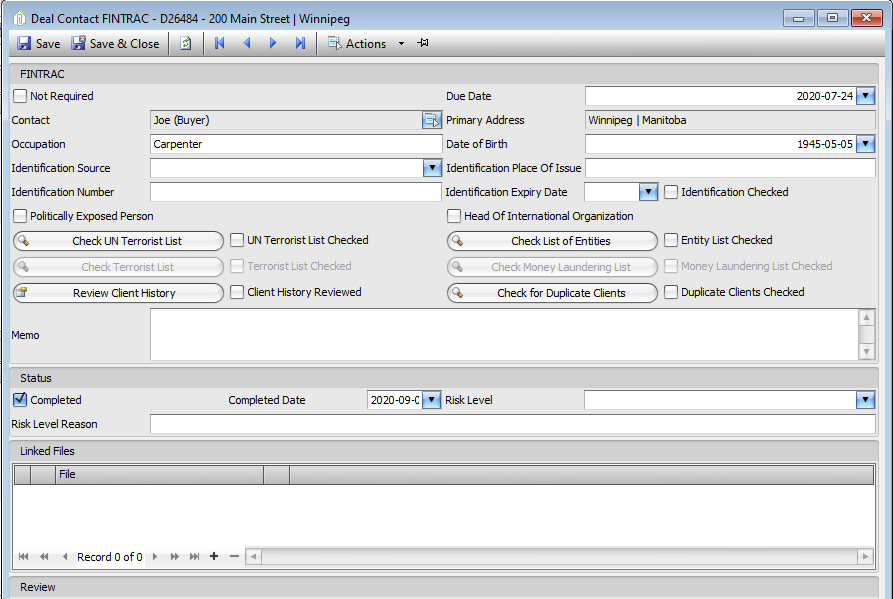
- Double clicking on the FINTRAC icon (check mark or triangle) will open up the new FINTRAC form you see below.
- The form will show you the information already entered into the contact and allow you to enter more.
- Only check the Politically Exposed Person & Head of International Organization IF they are a Politically Exposed Person or Head of International Organization
- By clicking on Check Terrorist List & Check Money Laundering List it will allow you to easily review if the Contact is on either list.
- The Files section allows you to pick from a file already loaded into the deal and assign it to this FINTRAC.
- The only required field to Complete the FINTRAC is the “Completed” checkbox in the Status section.
- Please review your current FINTRAC process and determine which you do and do not want to enter.
- We have tried to incorporate as many requests as possible, but you may not want to use everything we have included.
5. Deal Checklist tab
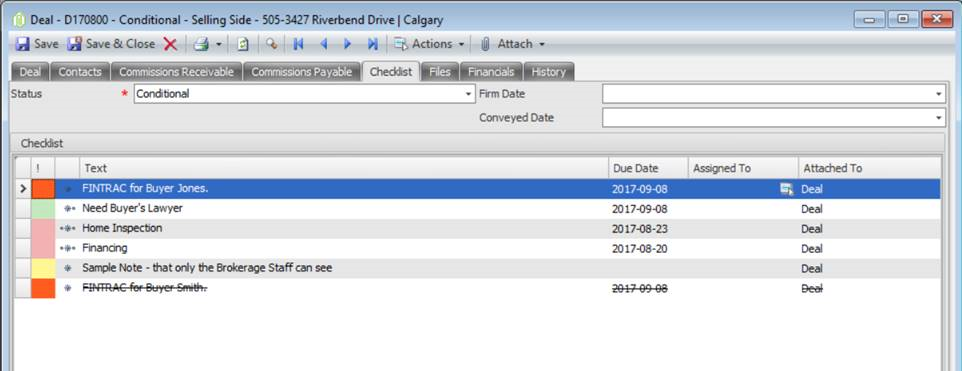
- The current Files tab has been split into a Checklist and a Files tab
- The Checklist tab will include Red FINTRAC rows for any that are required.
- You can also open the FINTRAC from this tab by double clicking on the first column in the FINTRAC row.
- The FINTRAC will appear with a strike through line if it has been marked as “Completed”.
Comments